
What you need to start a DIYBio Lab Part 1
A series of articles sharing my journey setting up a home biology lab

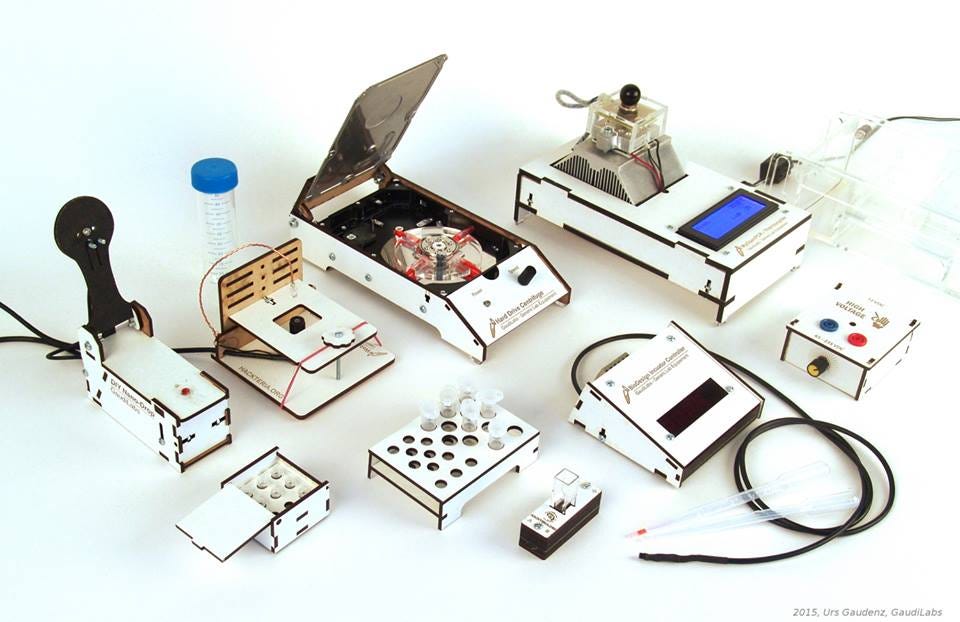
Hey there, this is Noot. I am a PhD student with a research focus on Synthetic Biology, and more recently, a DIYBiologist. I have, for quite a few years now, been watching the developments in DIYBio (short for do-it-yourself biology), and was thoroughly impressed by the ingenious ways to do real biology without the millions of grant funding that universities enjoy. I decided it was about time for me to join in the fun, and hopefully contribute to making genetic tools and genetics education more accessible to everyone.
In this series of Substack articles, I will be sharing my journey of starting my home lab to do synthetic biology research independent of my PhD and university, and hopefully inspire you to do the same.
Why start a DIYBio Lab?
There could be many reasons why someone would want to start a DIYBio lab at home. For a trained academic, a DIYBio lab can be a space where one could freely explore ideas without the constraints of academic bureaucracy, endless teaching responsibilities, grant applications, and the overbearing pressure of “Publish or Perish”. Having been in both academic labs and the biotech industry, I sometimes felt depressed and disillusioned when the need to deliver results takes precedence over the my genuine interest in Science. I could think of countless projects I would want to work on that were turned down or left incomplete because it did not fit the more urgent goals of the lab or the company. DIYBiology is a refuge for me explore my scientific creativity and satisfy my innate curiosity, helping me remember why I chose to pursue a career in Science in the first place.
Another reason why a scientist would want to do DIYBio is to own what they do. A DIYBio lab is essentially the lab of an independent scientist - a scientist that is not bound by employment to any university or other commercial entities. Any discovery or invention is solely owned by you. You can start a business to commercialize the technology without having to ask for permission, or having to give up ownership of your company to use the very invention you created. This is ideal for bioentrepreneurs with ideas that can be feasibly done in a basic molecular biology lab (e.g. cloning). I too would love to spin-off businesses from my DIYBio efforts.
And for anyone that has no formal training in biology, DIYBio democratizes biology for everyone. Academia and Science is, unfortunately, a rather elitist community. You barely get taken seriously without a PhD. Building and owning a DIYBio lab allows anyone that is willing to learn the theory and skills in biology to make novel discoveries and contribute meaningfully to Science.
Basic techniques and tools in molecular biology
To know what I need to build my lab, I first need to figure out what I would want to do in the lab. As a general guideline, I chose cloning a transgene (i.e. a foreign gene) into a plasmid vector for expression in a microbial host to be my first goal. These are skillsets that allows one to grow (almost) anything. To do this, there are a few techniques required to make this work.
1. Aseptic techniques and Biosafety
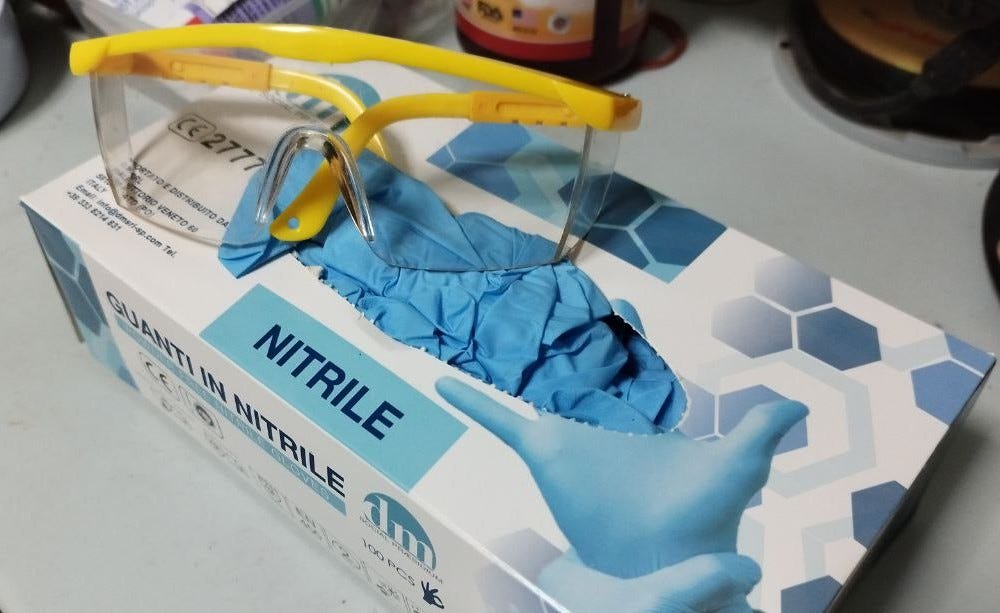
Safety first. When working with biological agents, care should be taken to avoid unnecessary risk to the scientist. For most of my DIYBio projects, I would be working with established microbial species like E. coli, microalgae and yeast, all of which have a long history of safe use. Still, care should be taken to avoid contaminations. To protect myself, I would be wearing nitrile gloves, safety goggles, and a lab coat when working in the lab. You can they these from a regular hardware store. I would also be treating all my microbes with household bleach before disposal to avoid introducing biohazards into the environment.
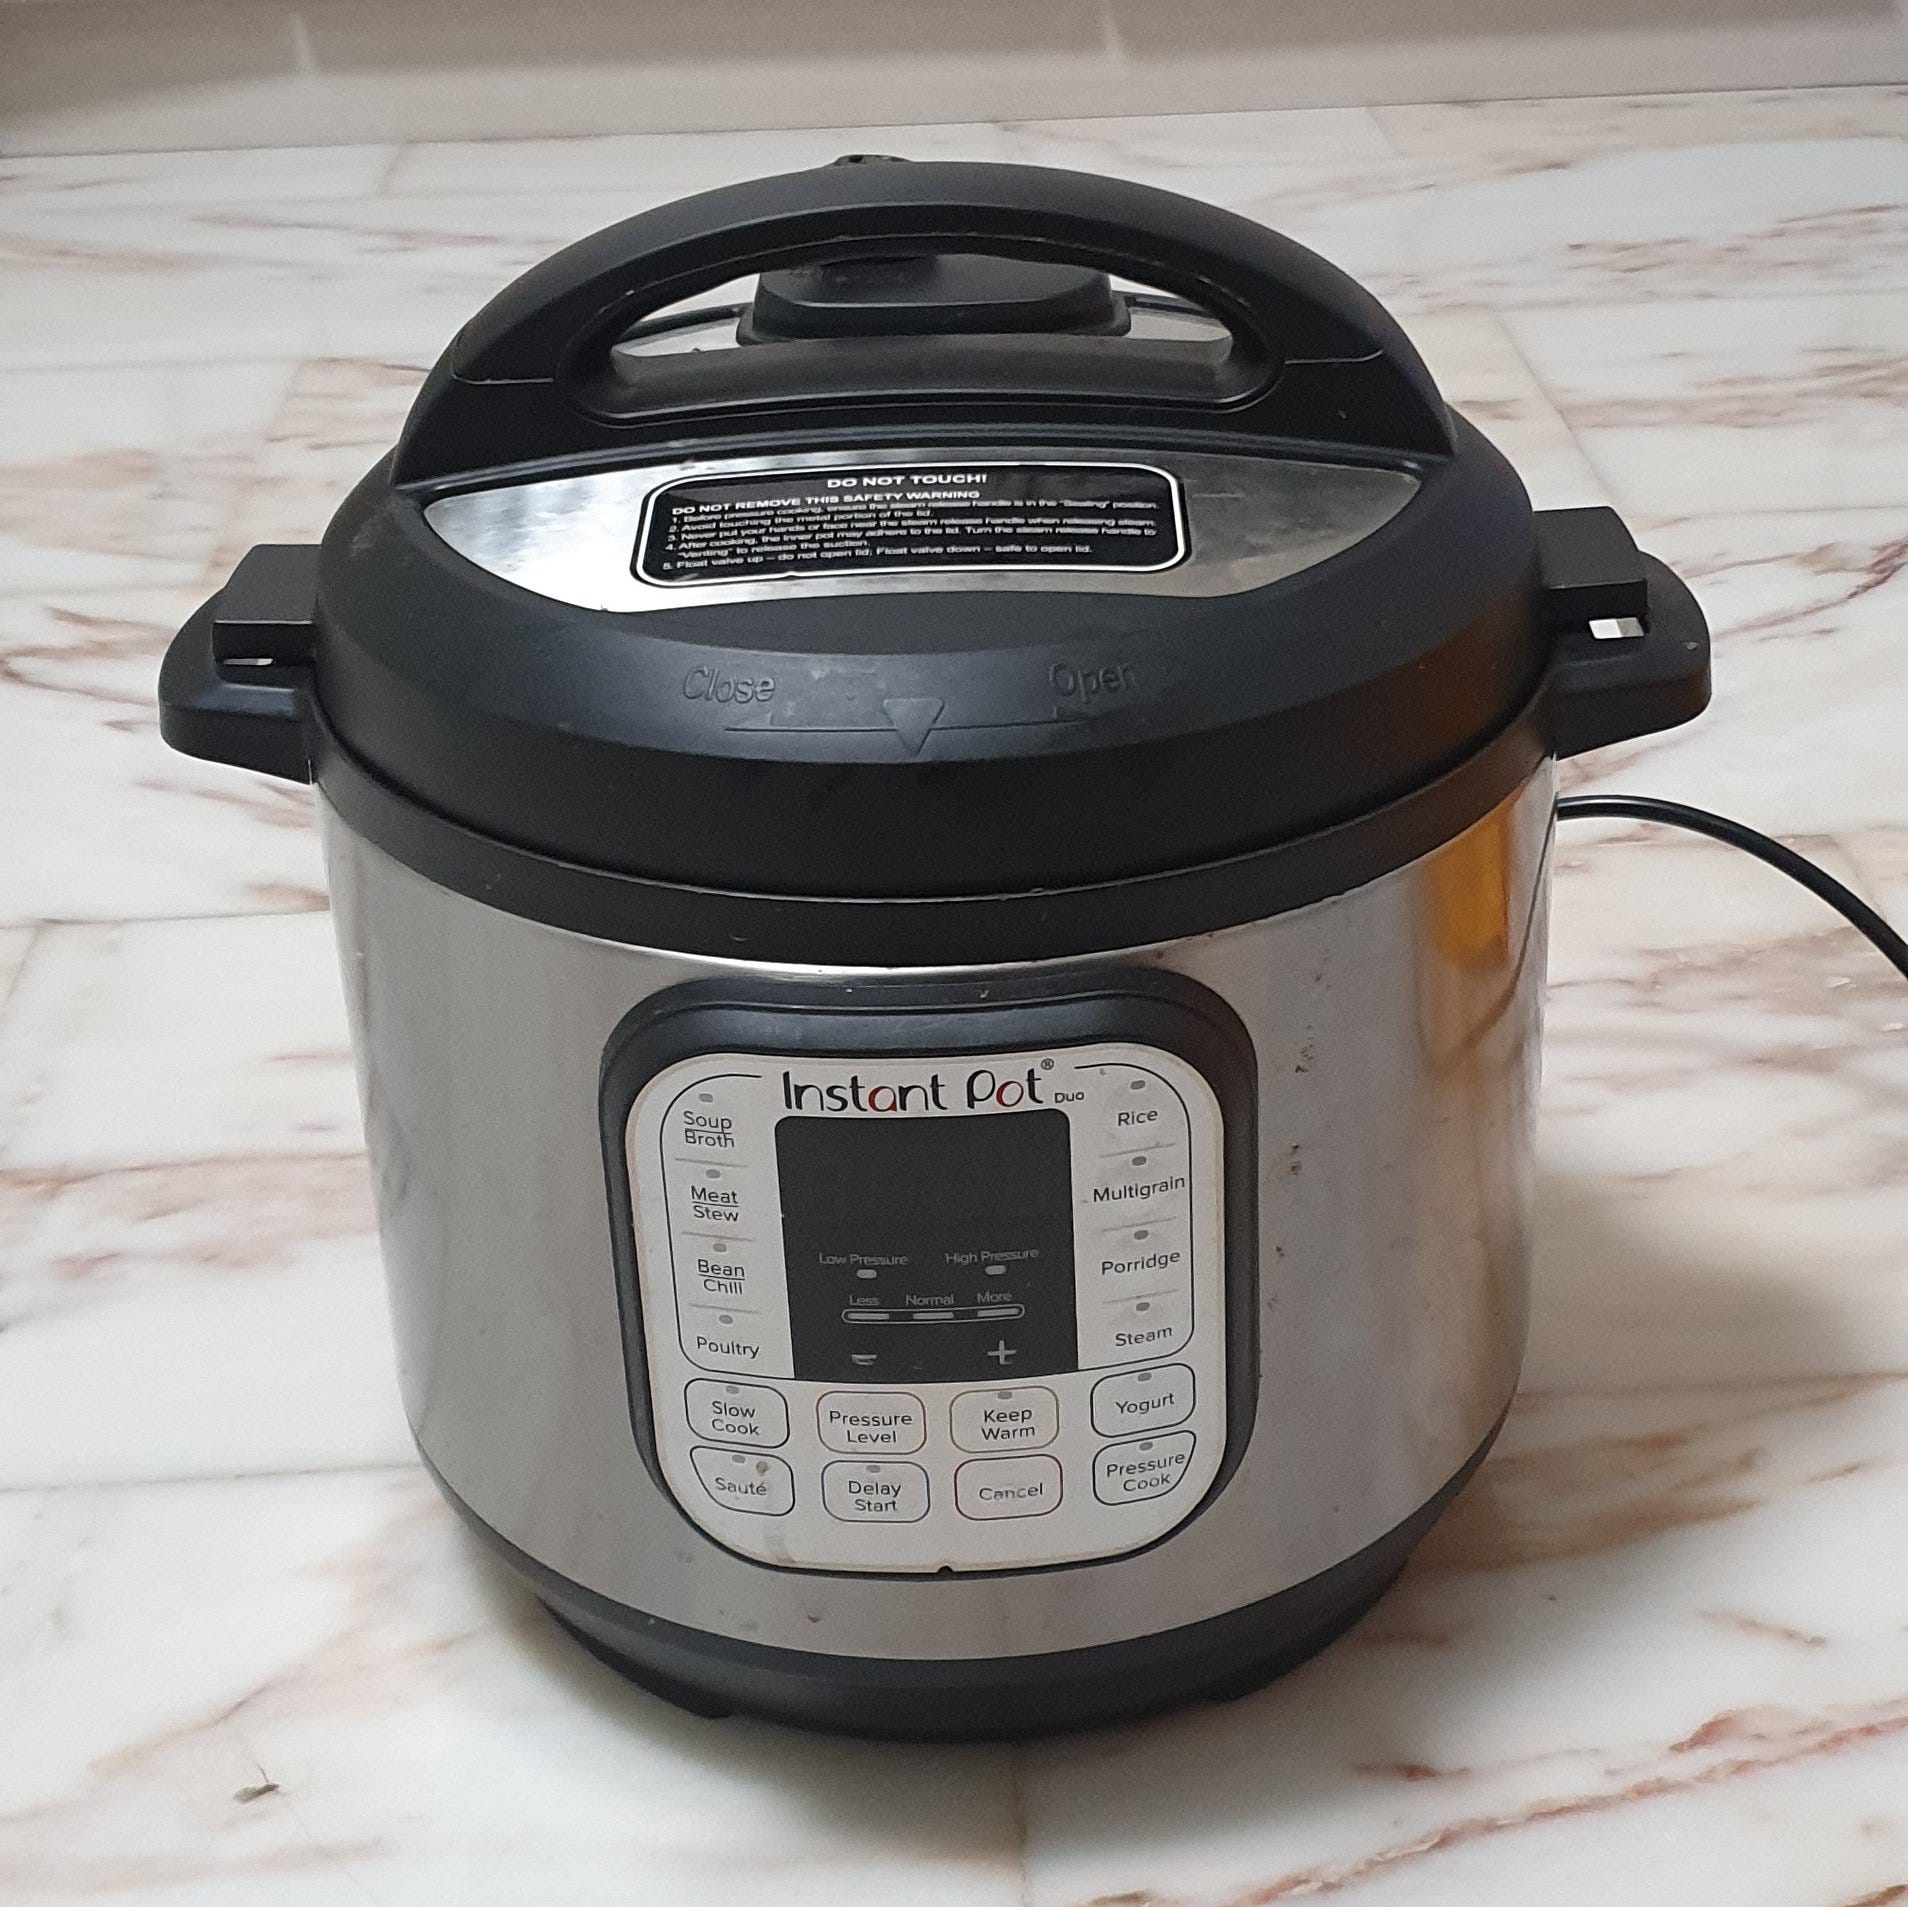
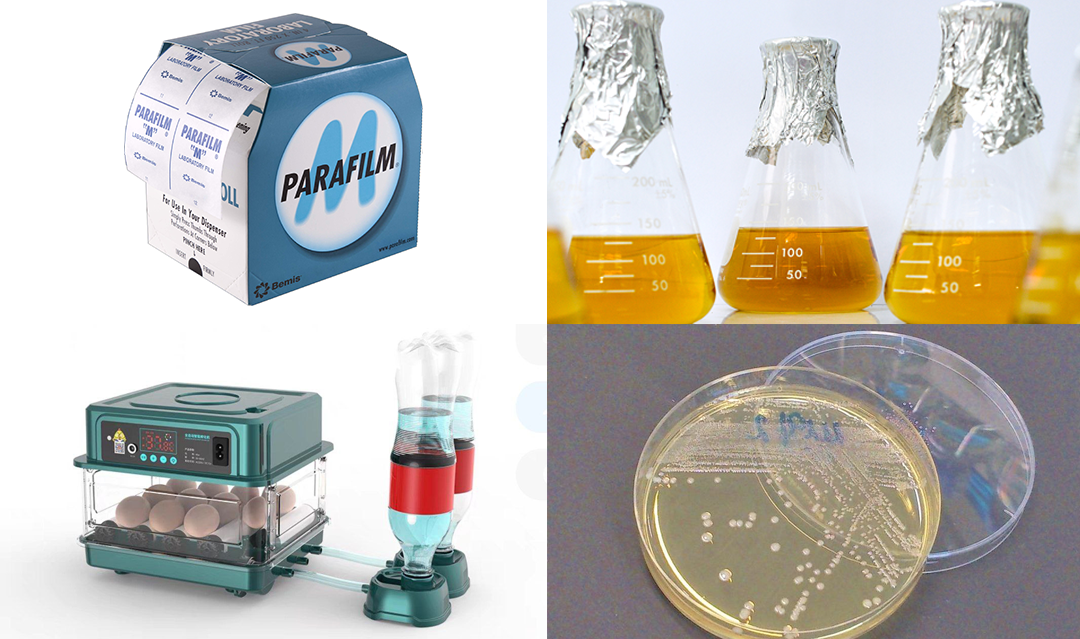
Another core principle of molecular biology is aseptic technique. Because the conditions I use to grow microbes would be ideal for growth of most microbes found in the environment, any contamination would quickly propagate and ruin my experiments. To prevent this, every tool and reagent I use needs to be sterile. In an academic lab, an autoclave is use, which is essentially a glorified pressure cooker able to heat tools and reagents up to 121°C and 15 psi to destroy all microbes, including fungal spores. I can’t afford one of course, so I am using an Instant Pot, which has been shown to be as effective as a regular autoclave.
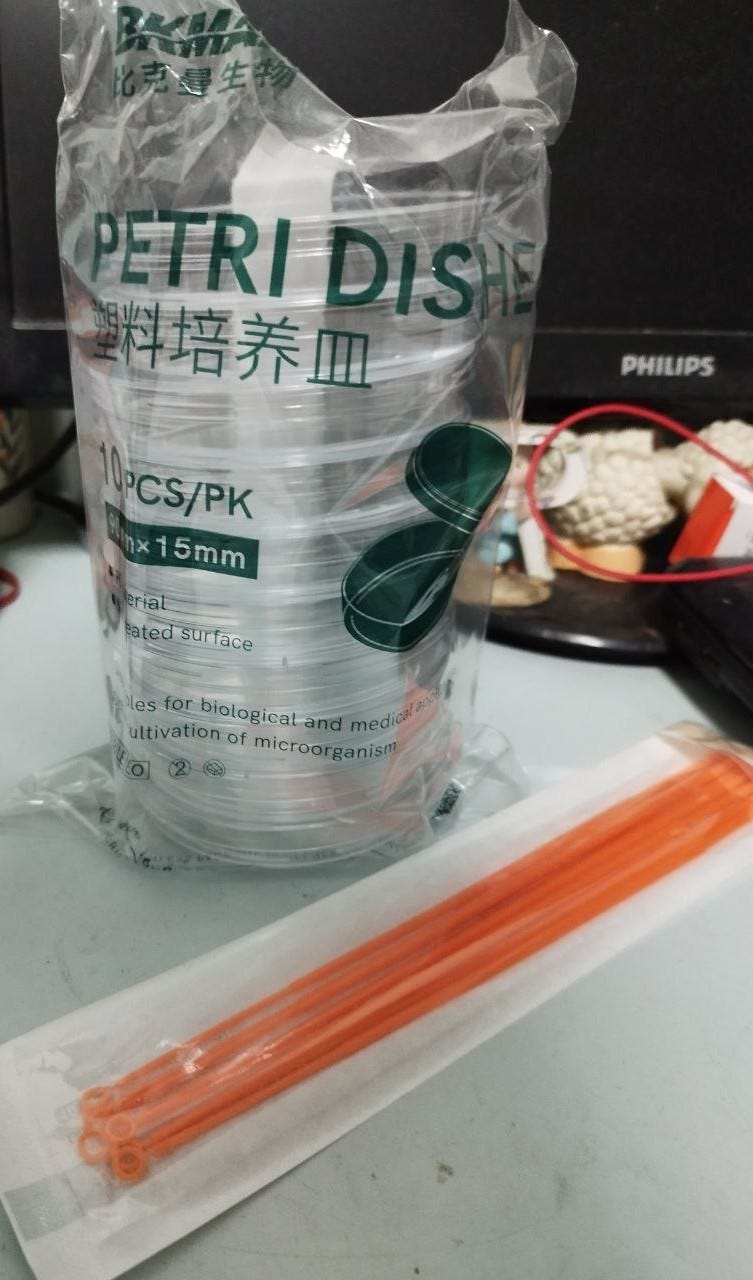
I am not going to autoclave everything though. Some tools like petri dishes and loops are cheap, and sterile single-use versions are commercially available. For these, I have purchased enough on Taobao (China’s Amazon, but much cheaper) so they would last a while. While using sterilized tools help with keeping contamination away, one must still minimize the chances that microbes in the air would land on your experimental cultures. Ideally I would use a laminar flow hood, but I don’t have access to that at the moment, so I will simply minimize exposure of my petri dishes and flasks to the air as much as I can.
2. Bacteria culture
Molecular cloning starts with culturing a bacteria host. I would be using E. coli, the most versatile prokaryotic host there is. Plasmid vectors usually come in an E. coli host, which can be replicated by growing the E. coli cells. This is done in liquid Lysogeny broth (LB) medium, which I have procured some from Taobao. Liquid cultures are ideally grown in a sterile vented conical flask, and shaken at 37 °C in an incubator. The incubator maintains a constant 37 °C temperature for cells to grow well, and also maintains high moisture so that the culture would not dry out. Orbital shaking maintains good mixing and aeration for the bacteria. My plan for this set up is to skip the commercial lab orbital shakers that could cost thousands, but instead combine an egg incubator with an orbital shaker to serve the same function with a $100 budget. Without the orbital shaker, the egg incubator on its own is perfectly suited for culturing microbes on petri dishes. Bacterial plate cultures can be prepare by mixing LB medium with agar to form a solid nutrient surface for bacteria to grow on. For extra sterility, make sure to wrap the petri dish with parafilm.
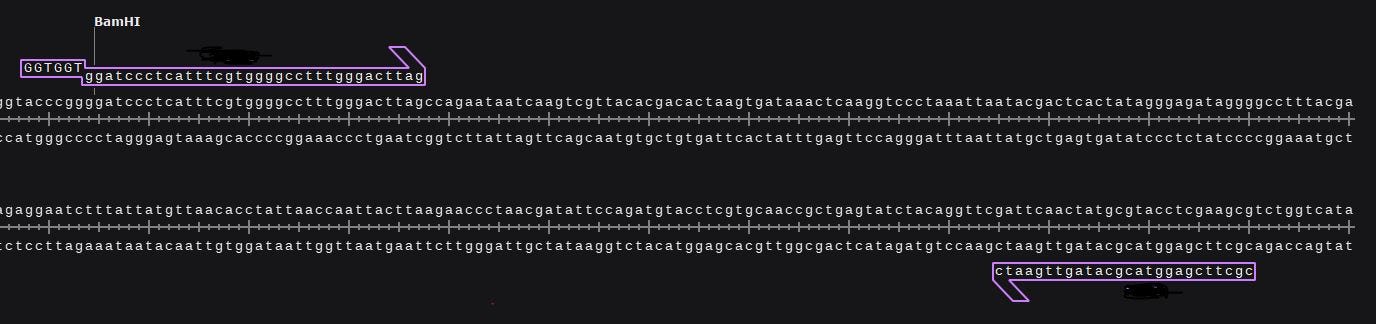
3. Polymerase chain reaction (PCR)
Now that we have our tools for growing bacteria, next I would want to modify some DNA. PCR is a tool to amplify specific chunks of DNA that we want to work out of a larger source of this DNA, like a plasmid or a whole genome. To do PCR, we would need to design primers, which are short DNA molecules with sequences that flank the region of DNA that we want to amplify. Design of primers is only possible if we know the sequence of our target region. If the template DNA is a plasmid, we can get the sequence of the plasmid from the plasmid source e.g. Addgene. If the template DNA is an organism genome, then we can download the genome sequence from NCBI. DNA sequences (.dna or .gb) can be read with commercial software like SnapGene or Benchling, or open-source ones like ApE. I will not go into the intricacies of primer design here, but will do in a future post. Once designed, primers can be customized and purchased from reputable oligo synthetizing companies like IDT, which ships super fast, like within a day.
With the template DNA and primers secured, we would need the enzymes that actually performs the PCR. These are called DNA polymerases, and there are many types available on the market. The best types for cloning are high fidelity (Hi-Fi) polymerases, but these are get pretty pricey. I am still on the look out for low-cost Hi-Fi polymerases (maybe trying some from Taobao) so let me know if you have any suggestions!
For PCR to work, rapid changes in temperatures will be needed to allow DNA to repeatedly stick together, copy the DNA, and separate in cycles. This is usually automated in a machine called the thermal cycler. New machines cost thousands of dollars which I cannot afford. Even the popular low-cost BentoLab costs $2000. My best bet is to look for an old used thermal cycler that academic labs that have shut down. An MJ Research Thermal Cycler can sometimes be found for $150. I am still on the lookout for one in working condition!
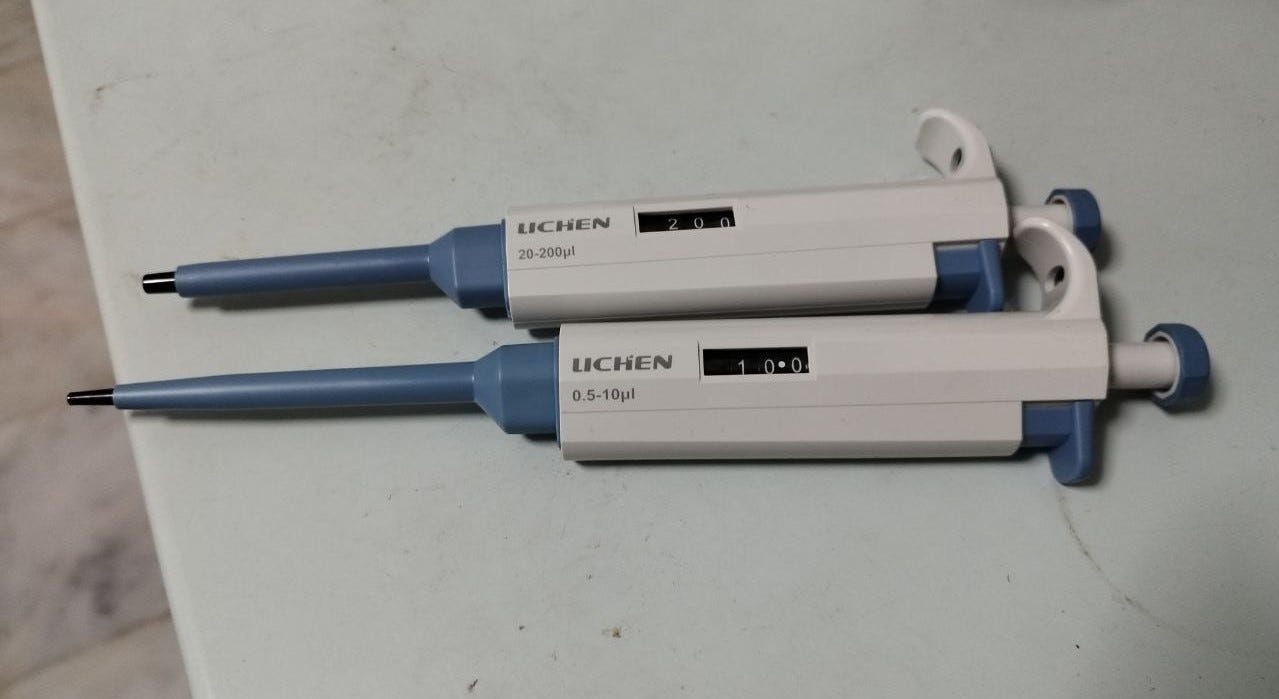
Of course not to forget, PCR is typically done in very small volumes - we are talking about handling liquids of as little as 0.5 μL. The only way to do this is to use micropipettes. Micropipettes come in different sizes so its important to decide which is most suitable for your purpose. I found the p200 (which handles volumes 20 - 200 μL) and the p10 (which handles volumes (0.5 - 10 μL) to be most useful for my purposes. Anything in between, or larger in volume can still be accomplished by simply pipetting multiple times. I got these for $20 each from Taobao.
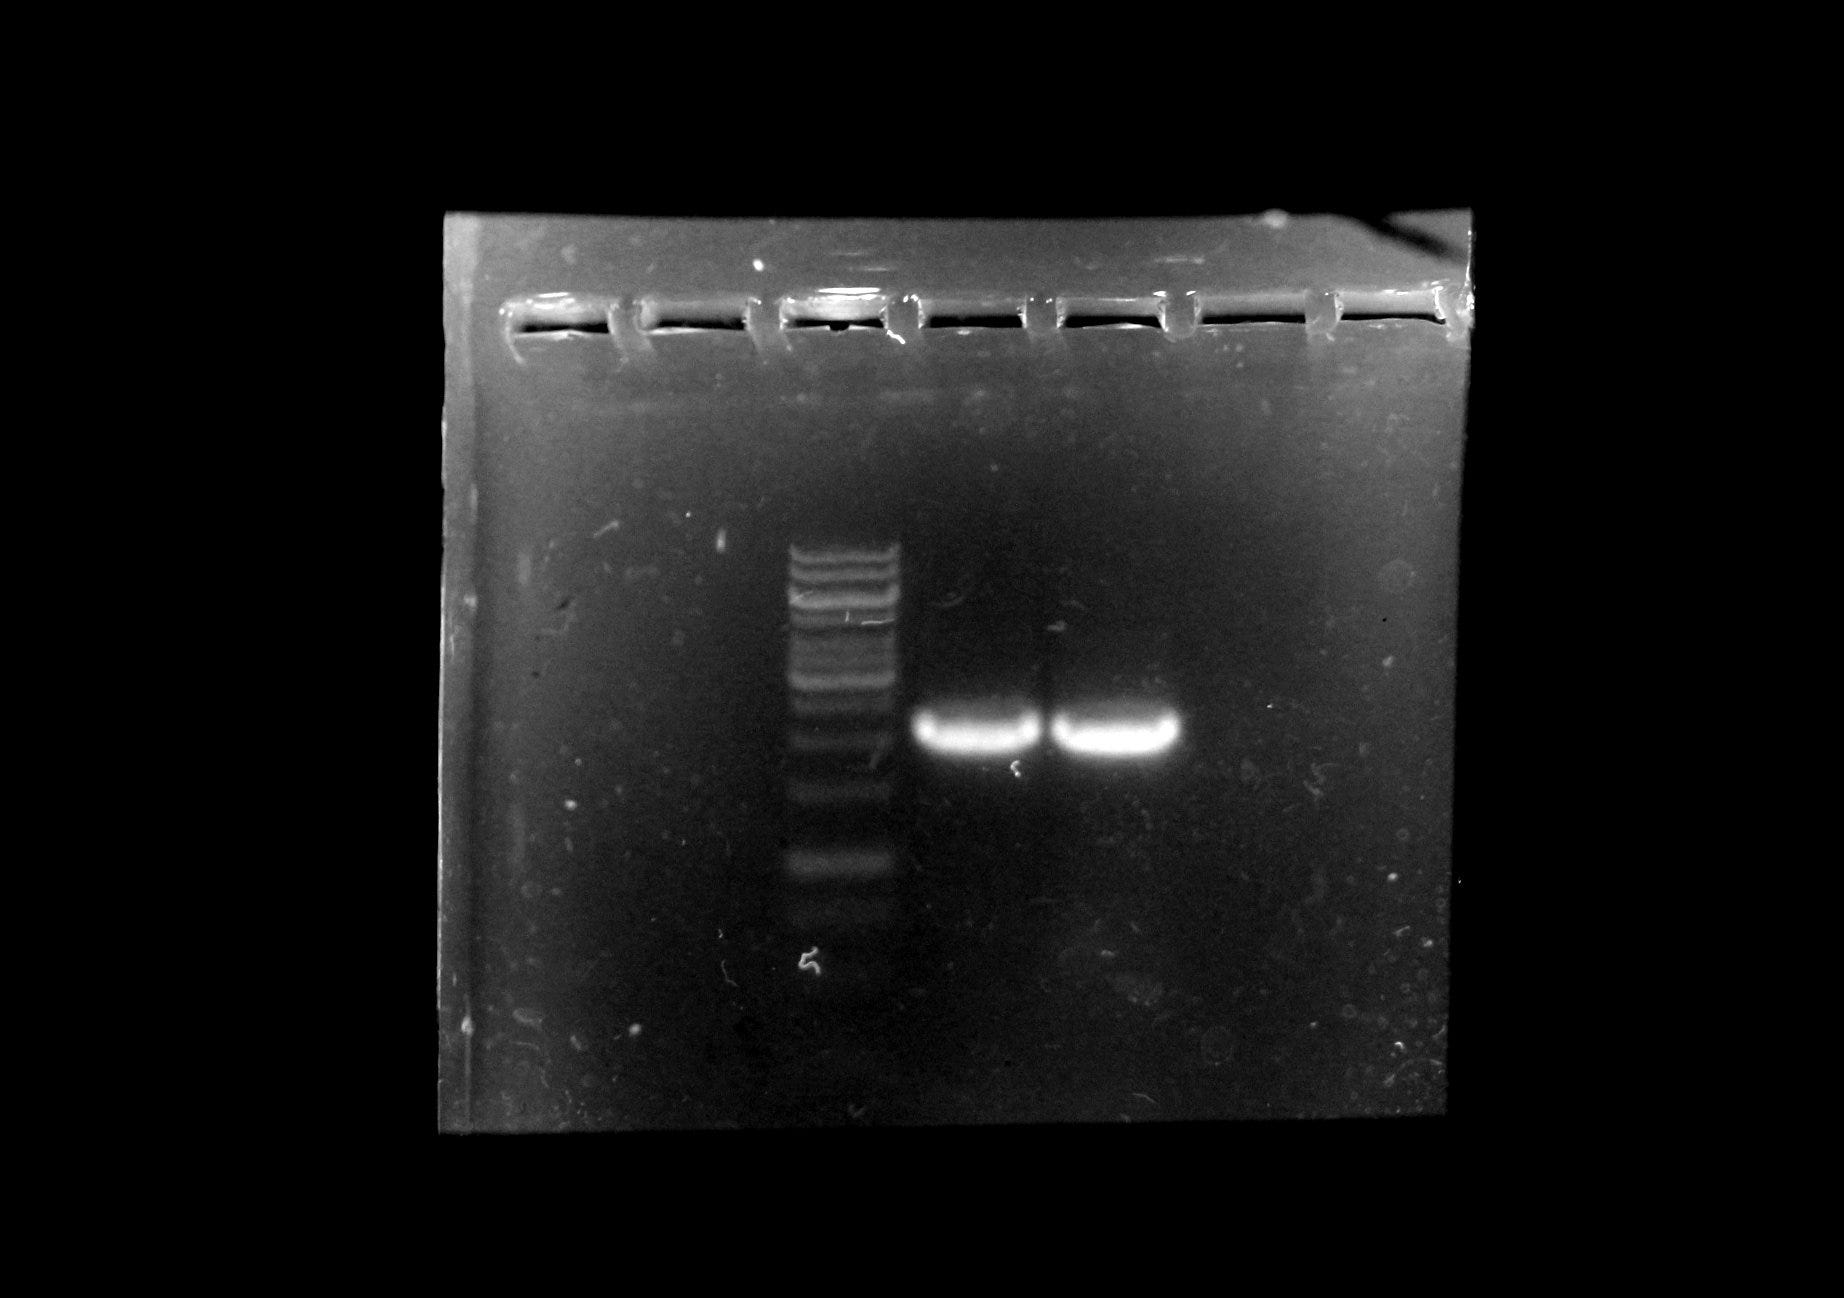
4. Gel electrophoresis
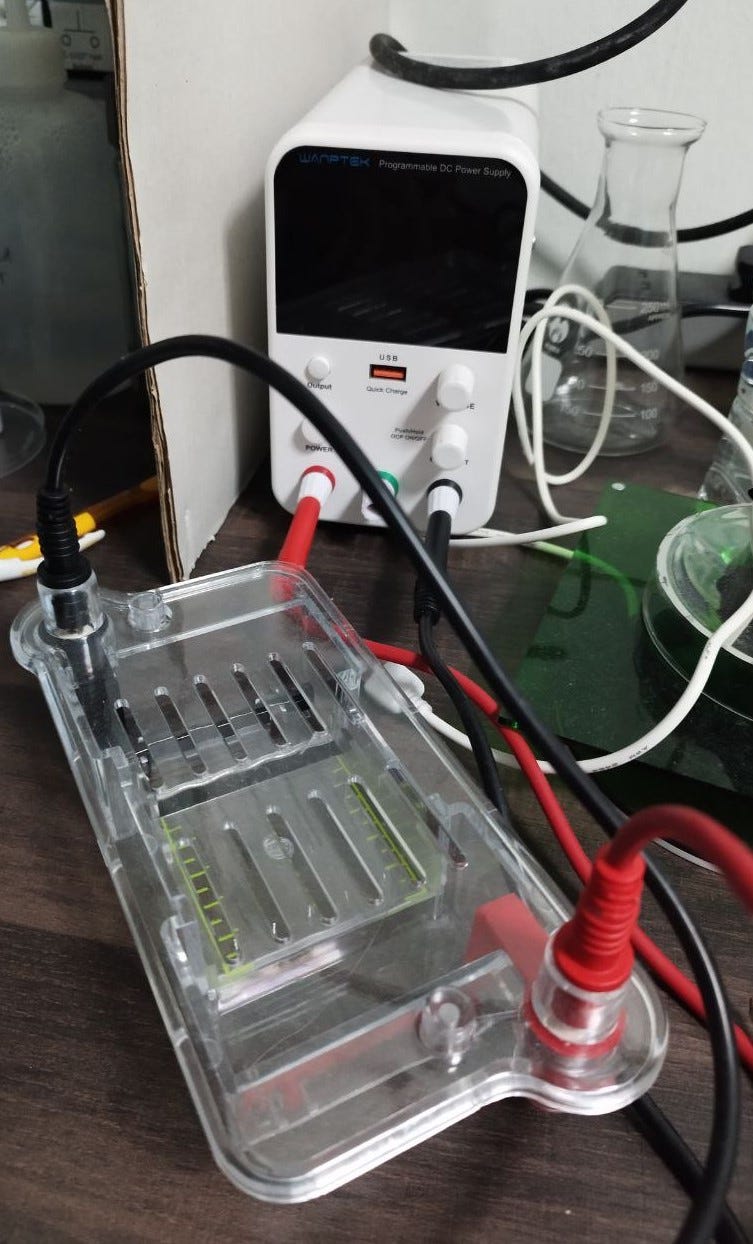
Once you have amplified your DNA, you would want to check if the PCR was successful. The simplest way is to check if the size of the actual DNA is the same as expected. This is done by gel electrophoresis, which passes DNA through an agarose gel and separates DNA by size. This is compared with a mixture of DNA of known sizes called a DNA ladder, so we can estimate the size of our PCR product. A Biorad gel electrophoresis set up can be quite pricey, costing more than $1000. I am building one of my own by modifying equipment I got off Aliexpress. First, I would need a power supply that can deliver 100V and 300 mA, which I got for $60 on Aliexpress. I also got a gel tank for $20, but the electrodes were made of steel which instantly corroded after a few runs. Its easy to fix this by replacing the anode with a platinum wire which I got from a jewelry store for $31. After running the gel, the DNA can be visualized with a UV Transilluminator if the agarose gel contains a DNA-binding fluorescent dye or stain. Once again, commercial ones are crazy expensive, so I built one myself using some UV LEDs, which costed less than $10 in total.
5. DNA purification
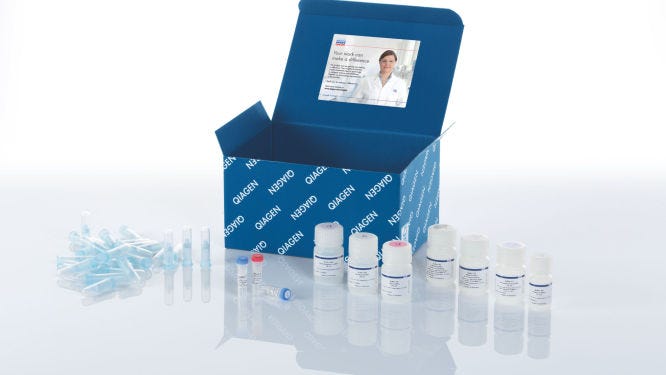
Before putting two pieces of DNA together, we need to purify the DNA to get a solution with only the piece of DNA that we want and almost nothing else. This is done with a DNA purification kit and a centrifuge. For plasmids, a Miniprep kit is needed. A centrifuge that can hold Eppendorf tubes are not that expensive these days, I would probably get one for about $100 online. DNA purification and Miniprep kits are be pricey, and I am still on the look out for cheaper alternatives.
Once purified, DNA content needs to be quantified before we can proceed with restriction enzyme (RE) digestion and ligation (or simply ligation if we are doing Gibson assembly). While not the most accurate, Nanodrop is typically used by measuring the UV-Vis absorbance, but this equipment is not cheap. Another cheaper way is to quantify the DNA by gel electrophoresis, which I will try as a low-cost alternative.
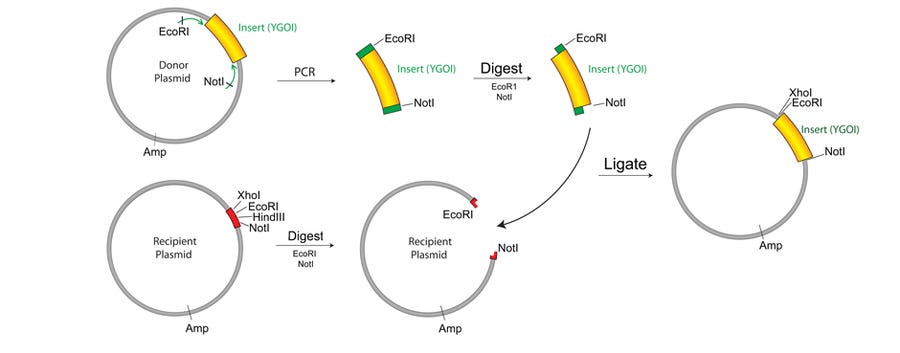
6. RE digestion and ligation
The next step is to cut and join the DNA pieces together. By introducing RE sites in your DNA insert by PCR, the insert can be digested with specific REs to be inserted into your vector if the vector has been digested with the same REs at the specific RE sites. Joining of digested DNA fragments is accomplished with an enzyme called ligase. REs and ligases are usually purchased from NEB and they work reliably well, but it would be nice to find cheaper alternatives.
7. Transformation
After the recombinant plasmid is assembled, we need to move the plasmid into a living bacteria cell for expression of the genes of interest. This is done by a process called transformation, which introduces foreign DNA into a bacteria cell by temporarily creating holes in the membrane of the cells. The cheapest way to create these holes is by preparing chemically competent cells using calcium chloride (CaCl2) to induce formation of these holes. A further heat-shock enlarges the holes to allow large pieces of DNA to enter the cell. Equipment needed to perform chemical transformation of cells would include a spectrophotometer to measure the optical density of bacteria cells, a centrifuge for pelleting the cells, and a heat block for the heats shock process.
8. Selection and colony PCR
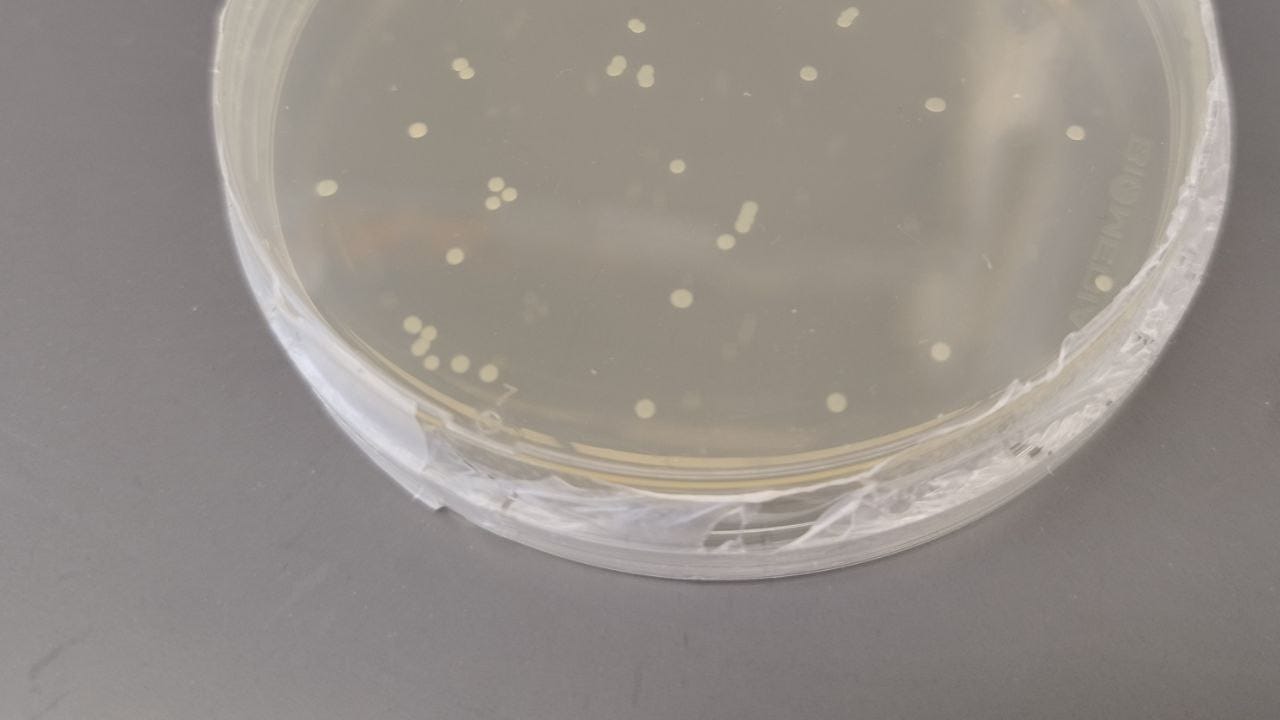
Not all E. coli cells would have taken up the foreign DNA. To ensure we end up with only cells with our desired foreign DNA, a form a selection is needed. Antibiotics are a common way to select for successfully transformed cells. Typically, an antibiotic resistance gene is placed on the vector, such that only cells that have taken up the recombinant plasmid (or the original vector), will be conferred resistance to the antibiotic used for selection. Antibiotics are controlled poisons in many countries, so I am still trying to figure out how to navigate my local laws around this. Ideally, I should try to use antibiotic-free selection.
With selection, what you would end up with after plating transformed cells on the selection agar plate are round colonies, each representing a clone of E. coli cells. To confirm the presence of the foreign gene and thus successfully cloning, colony PCR needs to be done. This entails picking each colony carefully with a pipette tip, suspending it in sterile water, and using it as template DNA to PCR for the presence of the target DNA sequence. And that’s it, you would have successfully cloned a gene!
Summary of tools needed to start a DIYBio lab
Here’s a summary of what tools I have acquired thus far, where I got them from, and how much they cost. My intention for writing these Substack articles was to simply document my journey into DIYBio, but for anyone that is reading this, I would love to have you onboard!
All prices in USD for ease of comparison, but I do pay in multiple currencies depending on the platform I use.
Common E. coli strains: Free [I got them from a lab willing to share; labs routinely throw out excess bacteria cells so it costs them nothing to share]
Nitrile gloves, safety goggles, lab coat, household bleach: $30 [Cheap stuff you can get at any hardware store]
Instant Pot: $100 [I got this used]
Petri dishes and sterile loops: $10 [From Taobao, got enough to last awhile]
Conical flask: $10 [I got this a while ago from an arts supply shop so it was a little overpriced, they cost less than a dollar each on Taobao]
LB broth: $12 [Taobao]
Egg incubator: $18 [Taobao]
Orbital shaker: $130 [The egg incubator provides some agitation, but not enough for proper culture. I have not gotten the orbital shaker yet, but likely either from Taobao or a local marketplace app]Agar: $6 [Taobao]
Parafilm: $32 [Local supplier, I don’t think they is even an alternative to this?]
Primers: ~$5-10 each [IDT]
Plasmids: Free or $75 [I got some from labs that are willing to share for free, or you can order them from Addgene]
DNA polymerases: Still looking for a low-cost alternative, the one I use in my PhD lab costs like $250Thermal cycler: $150 [Trying to get a used one within this budget]Micropipettes: $40 [$20 each from Taobao, I got the p10 and p200]
Agarose and TAE buffer: $40 [$20 for agarose powder; $20 for 50x TAE; from Taobao; should last a while]
DNA ladder: Costs like $200 for a vial, looking to explore this plasmid that generates ladders after RE digestPower supply: $60 [Aliexpress]
Gel tank: $51 [$20 for tank from Aliexpress, $31 for platinum electrode]
UV Transilluminator: $10 [Self built]
Gel stain:$100 [for SybrSafe; trying to find lower cost versions but not going to risk my health getting EB from China]6xDNA Loading Dye: $5 [Taobao]
DNA purification kit:$250 [Zymo Research; on the lookout for cheaper ones]Centrifuge (1.5 mL):$100 [Either used or from Taobao]Miniprep kit:$250 [Zymo Research; on the lookout for cheaper ones]Nanodrop:$15,000 [I don’t think I can afford this ever, will be borrowing this from my PhD lab for a while, or I could try building one myself]Restriction enzymes:$60 each [From NEB, can last a while, so might be worth it]Ligases:$80 [From NEB, can last a while, so might be worth it]Calcium chloride: $1 [From Taobao]
Spectrophotometer:$1500 [This is another one that is ridiculously expensive, I could build one myself or just guess the OD600 by eye]Centrifuge (15-50 mL):$250 [Used or from Aliexpress]Heat block:$100 [Looking for a used one now]Antibiotics:Not unaffordable, but how do DIYBiologists even get access to these?!Minifridge: $60 [Used, enough to keep my reagents]
Total spent thus far: $505
Long way to go towards my ideal lab, but we are getting there!
I've always dreamed about making a DIY lab and this "guide" is such a good intro!
Thanks.
Looking forward for updates
I just discovered this in June 2024, absolutely amazing resource. Any chance for a part 2? I want to make a lab in my basement.